Get Ahead of the Carve, DIY Succulent Pumpkin
Fall is clearly the season for pumpkins- pumpkin spice lattes, pumpkin pie, pumpkin candles, pumpkin butter, and of course, pumpkin decor. And when it comes to fall decorating, these colorful orbs are the universal symbol of autumn. Who hasn’t carved a silly or spooky face into the orange-colored squash to light the way for trick-or-treaters on Halloween? But pumpkins aren’t just for Halloween. In fact, they can be used and displayed in a variety of different ways.
Our Houseplant Buyer, Sarah, takes pumpkin decorating to a whole new level. Follow her step-by-step guide and carve out some fun with this whimsical, real pumpkin trimmed with living succulents- the perfect way to bring houseplants and fall together, both indoors and out. Keep your succulent creation through Thanksgiving for a colorful centerpiece. So, eat your pumpkin pie, drink your pumpkin latte, and get ready to create your very own gourd-geous succulent pumpkin planter.
HERE’S WHAT YOU’LL NEED:
Pumpkin, succulents, garden clippers, moss, Tacky, Elmer’s, or craft glue (as long as the glue is not water soluble, you are good to go), and, of course, a little creativity.
CHOOSING YOUR PUMPKIN:
Try to choose a pumpkin that has a flat top, allowing for lots of space for succulents. Remove the stalk from your pumpkin if you would prefer, however, this step in not necessary.
MAKING A BED FOR YOUR SUCCULENTS:
You can use any type of moss as a bed. Sheet moss is wonderful for its look and feel. As your succulents sit on the moss, they’ll begin to take root. Once Thanksgiving is over and the top of your pumpkin begins to decompose, simply lift the entire succulent garden off the pumpkin and replant elsewhere. Maybe a festive Christmas container?
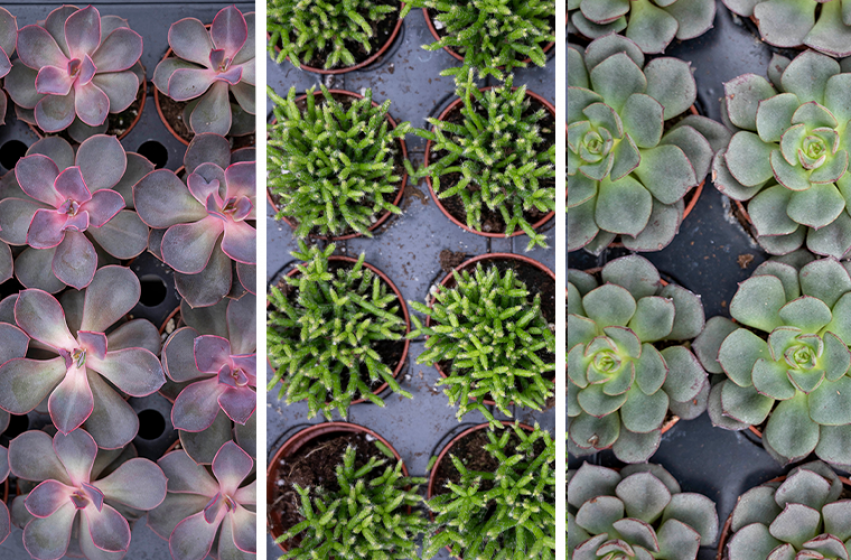
CHOOSING YOUR PLANTS:
Try choosing succulents with different colors, sizes, shapes and textures. This will help make your pumpkin planter look fuller, while adding dimension and texture.


PLANT PREP:
Remove the succulents from their pots along with any excess soil. If you need to cut some of the stalk back, that’s fine, just be sure to leave a few roots. If you lose a couple of leaves, that’s ok too.
PLANT CONFIGURATION:
Begin with your largest succulent selections first. Plant them in the middle, like a triangle (this is your focal point). Use a little glue on the stalk of your succulent and gently place on top of the moss bed. Nestle the second succulent in with it and follow-up with the third. For your next ‘layer’ choose a variety of succulents that are different from your first grouping. Use several of the same type succulent as you work around in a circle- this helps keep the look balanced. However, you can group in any way you like. Tuck the smaller succulents in the nooks beneath where two plants meet, so that your plants remain stabilized. Continue to add layers until you feel you have developed the look you are going for.
EMBELLISHMENTS:
After you are finished with your arrangement, you can always add other items to embellish your look. Try sticks, pinecones, eucalyptus sprays, fresh herbs, Invislites, etc.
CARE:
Leave your pumpkin to sit while the glue dries. Succulents prefer bright light and low water. Try to give your succulents a couple hours of sun each day. Water about once a week with a spray bottle or turkey baster. Apply water in between the succulents, so that the water reaches the roots (do not water from the top- always water at the roots).
TIP: Be sure you are familiar with the types of succulent you are using for your pumpkin. Some succulents are cold hardy meaning you can leave your pumpkin outdoors under 50 degrees. Some are tropical and cannot take temperatures below 50 degrees. Keep your pumpkin planter indoors if growing these varieties.